
Introduction
Melted Bead Suncatchers are a simple and colorful way to turn ordinary plastic beads into bright window decorations. This craft transforms small beads into stained-glass-style art that catches sunlight beautifully and brings life to any room. Because the process is easy to follow, it works well for beginners, families, and anyone who enjoys hands-on creative projects.
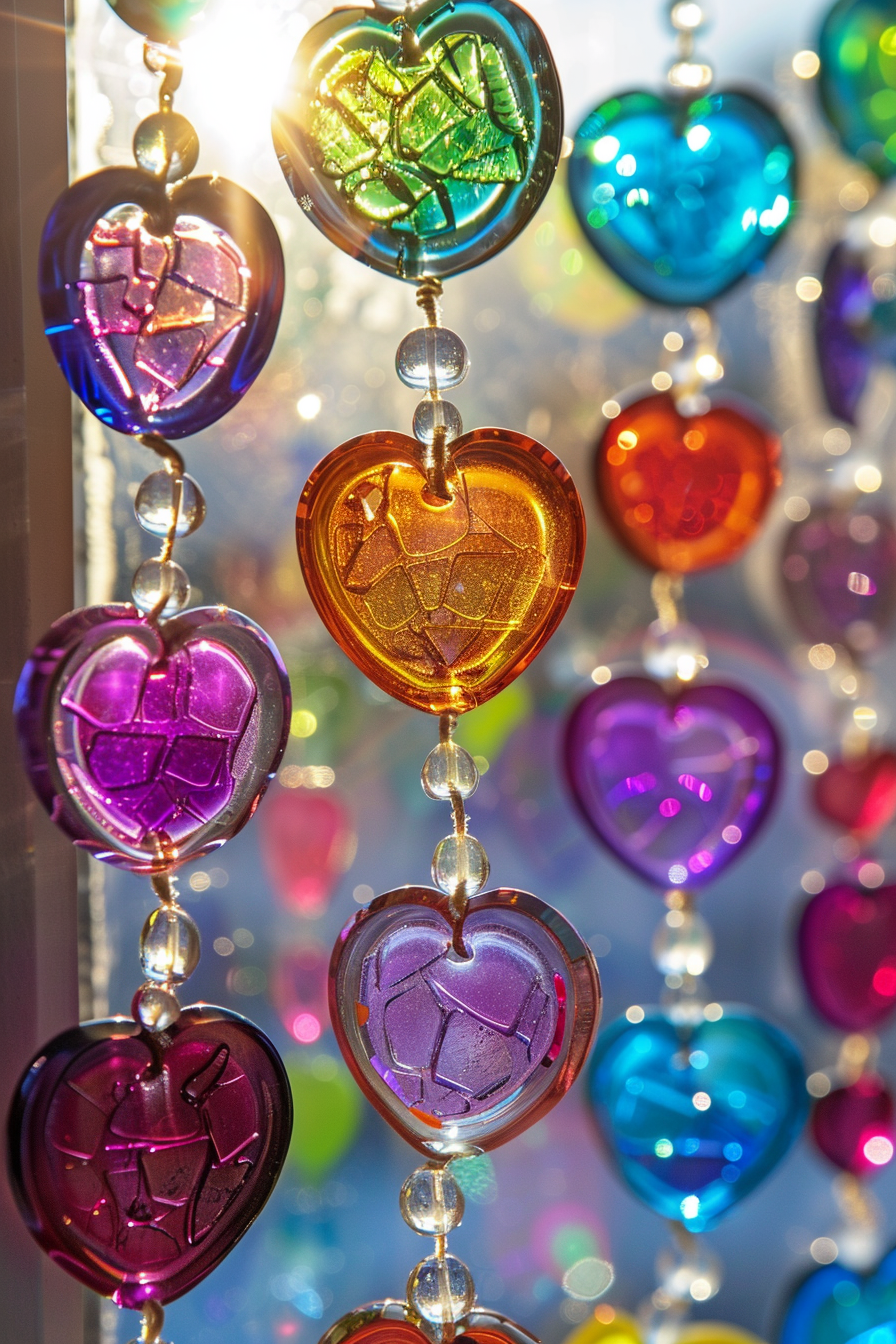
The appeal of Melted Bead Suncatchers comes from how quickly they change form. With heat, the beads soften, fuse together, and create smooth, glossy shapes. As sunlight passes through them, the colors glow and reflect in soft patterns across walls and floors. It feels almost magical, especially when different color combinations are used.
Many people enjoy this craft because it blends creativity with relaxation. You can plan patterns, mix colors, and experiment freely without strict rules. The final result is always unique, even if you follow the same steps. Whether used as home décor or handmade gifts, these suncatchers add charm and personality to any space.
A few years ago, this craft became a weekend activity during a rainy afternoon at home. With a small box of leftover beads and an old silicone mold, the first attempt was completely experimental. The beads melted unevenly at first, but the unexpected shapes turned out even more interesting than planned. That moment turned into a tradition, where each season brought a new color theme and design idea. Over time, the process became a calming routine that blended creativity with simple joy, especially when sunlight finally passed through the finished pieces hanging in the window.
Tried this recipe?
Let us know how it was!Ingredients
Equipment
Method
- Arrange plastic beads into a silicone mold in your chosen pattern, ensuring they are tightly packed.
- Place the mold on a baking tray and heat in a well-ventilated area until beads begin to melt and fuse together.
- Remove from heat and allow the melted beads to cool completely before handling.
- Carefully remove the solid suncatcher from the mold and check for any rough edges.
- Attach fishing line through a hole or drilled opening and secure it with a knot.
- Hang the finished suncatcher in a sunny window using a suction hook.
Notes
Tried this recipe?
Let us know how it was!Choosing Materials and Setting Up Your Space
Selecting the Best Beads and Colors
The foundation of Melted Bead Suncatchers starts with choosing the right beads. Transparent or translucent plastic beads work best because they allow light to pass through easily. Smaller beads tend to melt more evenly, while larger beads may keep some of their shape for a textured look. Both options can create beautiful results depending on the style you want.
Color choice also plays a big role. Bright rainbow combinations create a playful effect, while pastel shades give a softer, calming appearance. Some people prefer to group similar colors together, forming gradients or rings. Others mix everything randomly for a more abstract stained-glass look. Since the beads fuse together during heating, even simple patterns can turn into striking designs once melted.
Preparing Tools and Work Area
Before starting Melted Bead Suncatchers, setting up a safe and organized workspace is important. A silicone mold is commonly used because it prevents sticking and helps maintain shape. A baking tray provides stability when transferring the mold to heat. Scissors may also be useful for trimming fishing line later.
Working in a well-ventilated space is essential since melting plastic can produce strong odors. A toaster oven placed outdoors or in an open area is often used for safety. Keeping materials close by helps the process flow smoothly, especially when arranging beads quickly before they shift or roll.
Designing Creative Bead Patterns
Building Simple or Detailed Layouts
Designing Melted Bead Suncatchers begins by placing beads into a mold. Some people start from the outside and work inward, while others build from the center outward. Simple circular patterns are popular for beginners because they naturally resemble sun shapes when finished.
More detailed designs can include spirals, stripes, or layered rings. Even though precision is possible, perfection is not required. As the beads melt, edges soften and shapes blend together, which often improves the overall look. This forgiving nature makes the craft enjoyable for all skill levels.
Exploring Color Flow and Balance
Color placement affects how Melted Bead Suncatchers appear in sunlight. Placing contrasting colors next to each other creates bold visual separation. On the other hand, placing similar tones together creates smooth transitions.
Balancing color density is also helpful. If one side feels too heavy with dark shades, adding lighter tones can restore harmony. Since the beads shrink slightly during melting, spacing them tightly ensures fewer gaps. Once heat is applied, the design becomes a unified glass-like disc with flowing color patterns.
Melting and Forming the Suncatcher
Heat Process and Transformation
The transformation step is where Melted Bead Suncatchers truly come to life. Once the bead-filled mold is placed into a heated oven, the beads begin to soften. They gradually lose their shape, stick together, and form a smooth surface. This process usually takes around 10 to 15 minutes depending on heat level and bead size.
As the beads melt, they may shift slightly, creating natural blending between colors. This stage is unpredictable, but that is part of the charm. Watching the transition from separate pieces to a unified design feels rewarding and slightly surprising each time.
Safety and Cooling Techniques
Safety is essential when making Melted Bead Suncatchers. Because heated plastic releases strong fumes, proper ventilation is required. Many people prefer using a dedicated outdoor oven or a setup away from indoor living spaces.
After heating, the mold must cool before handling. Cooling allows the melted plastic to harden into a solid form. Removing it too early can cause bending or distortion. Once cooled, the suncatcher becomes firm, glossy, and ready for finishing touches. Any sharp edges can be gently smoothed if needed.
Finishing and Displaying the Artwork
Adding Hanging Elements
Once Melted Bead Suncatchers are fully cooled, the next step is adding a way to hang them. A small hole may already exist depending on how the beads fused. If not, a small drill or heated tool can be used carefully to create an opening.
Fishing line works well because it is nearly invisible in sunlight. It allows the colors of the suncatcher to remain the focus. A simple knot is enough to secure it, and then it can be attached to a hook or suction cup for window display.
Displaying for Maximum Light Effect
The best way to enjoy Melted Bead Suncatchers is by placing them in direct sunlight. Windows facing morning or afternoon light often produce the strongest color reflections. As light passes through the melted plastic, it creates soft glowing patterns on nearby surfaces.
Rotating or repositioning the suncatcher can change how the colors appear throughout the day. Some people even create multiple designs and hang them together, forming a colorful collection that shifts with natural light.
FAQ
What type of beads work best for Melted Bead Suncatchers?
Transparent plastic beads are ideal because they allow sunlight to pass through and highlight colors effectively.
Can Melted Bead Suncatchers be made indoors?
It is not recommended because melting plastic can produce strong fumes. A well-ventilated or outdoor setup is safer.
How long does the melting process take?
Most designs take about 10 to 15 minutes, depending on oven temperature and bead size.
Do the designs always turn out the same?
No, each piece is unique because the beads shift and blend differently during heating.
Can children help with this craft?
Yes, children can help design patterns, but adults should handle the heating and cooling steps.
Conclusion
Melted Bead Suncatchers offer a simple yet creative way to turn everyday materials into glowing window art. The process combines color selection, design planning, and heat transformation to produce one-of-a-kind decorative pieces. Because no two suncatchers ever look the same, each project feels personal and special.
This craft also encourages experimentation. Whether using bold rainbow patterns or soft blended tones, the final result always reflects individual creativity. When placed in sunlight, the finished suncatchers bring warmth, color, and movement into any space.
Leave a Reply