
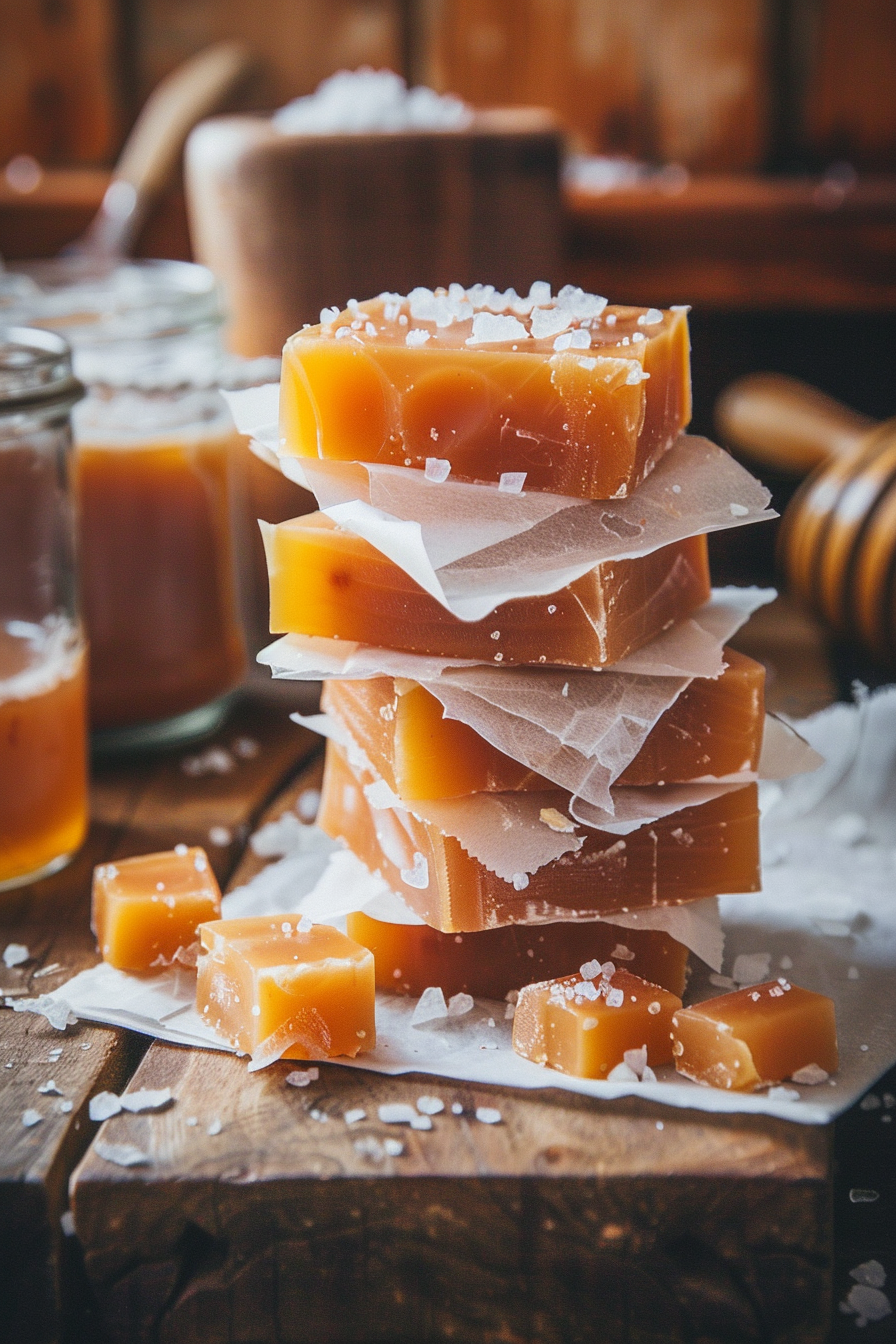
Salted Honey & Vanilla Bean Caramels bring together buttery richness, floral honey, warm vanilla, and flaky sea salt in one irresistible homemade candy. These soft and chewy treats feel elegant enough for holiday gifting, yet they are surprisingly simple to make right in your own kitchen. With only a handful of pantry ingredients and a reliable candy thermometer, you can create smooth, creamy caramels that melt beautifully with every bite.
The first time I made these caramels was during a chilly December weekend while holiday music played softly in the kitchen. The sweet aroma of bubbling honey and vanilla instantly made the house feel warm and festive. I wrapped each caramel in little parchment squares and tucked them into cookie tins for neighbors and friends. By the end of the evening, sticky fingers and buttery caramel scraps covered the counter, but nobody minded. Ever since then, these homemade caramels have become part of our yearly holiday tradition because they always feel thoughtful, comforting, and wonderfully homemade.
Ingredients
Equipment
Method
- Add softened butter to a large mixing bowl and beat until smooth and creamy.
- Add powdered sugar, honey, cinnamon, vanilla extract, and salt if using.
- Beat until the mixture becomes fluffy, smooth, and fully combined.
- Spoon the cinnamon honey butter into three clean half-pint jars.
- Wipe jar rims clean and secure lids tightly.
- Decorate jars with fabric circles, twine, ribbon, and gift tags if desired.
- Refrigerate until ready to gift or serve.
Nutrition
Notes
Tried this recipe?
Let us know how it was!Why These Homemade Caramels Stand Out
The Perfect Sweet and Salty Balance
Salted Honey & Vanilla Bean Caramels have a flavor that feels richer and more layered than classic caramel candies. The honey adds floral sweetness while the vanilla bean creates a warm depth that pairs beautifully with butter and cream. Then the flaky sea salt cuts through the sweetness and gives each bite a balanced finish.
Because the recipe uses both honey and corn syrup, the texture stays smooth and chewy instead of grainy. The result is a caramel that feels luxurious without requiring complicated candy-making techniques. Even beginner cooks can make these successfully with a little patience and attention to temperature.
Another reason these caramels shine is their versatility. They fit perfectly into holiday dessert trays, gift baskets, party favors, or afternoon sweet cravings. Plus, they store well for weeks, making them ideal for advance preparation during busy holiday seasons.
The vanilla bean also deserves special attention. Tiny vanilla specks throughout the caramel make the candy feel bakery-quality and homemade at the same time. Although vanilla extract works well, real vanilla bean adds an extra layer of flavor and visual appeal that elevates the finished result.
Why Honey Makes a Difference
Many caramel recipes rely entirely on sugar and corn syrup, but honey changes everything. Instead of tasting flat or overly sweet, these caramels develop subtle floral notes and a slightly deeper flavor profile.
Using high-quality honey matters because its flavor comes through clearly. Local or organic honey often delivers the best results. Clover honey gives a mild sweetness, while wildflower honey can add more complexity.
Honey also contributes moisture and softness, helping the caramels stay tender for longer. That means your candies remain chewy and fresh instead of becoming hard after a few days.
Additionally, honey pairs naturally with vanilla and sea salt. Together, those flavors create a cozy combination that feels especially fitting during colder months. Every bite tastes warm, buttery, and comforting.
Essential Ingredients for Salted Honey & Vanilla Bean Caramels
Choosing the Best Dairy and Sweeteners
Heavy cream forms the rich foundation of these Salted Honey & Vanilla Bean Caramels. The high fat content creates a creamy texture that simply cannot be achieved with milk. Therefore, it is important not to substitute lower-fat dairy products.
Granulated sugar provides sweetness and structure. Meanwhile, light corn syrup prevents crystallization and keeps the candies silky smooth. Although some people prefer avoiding corn syrup, it plays a very important role in caramel consistency.
Unsalted butter gets stirred in at the end of cooking to stop the caramel from overheating. It also adds glossy richness and improves the final chew. Since sea salt gets sprinkled over the top, using unsalted butter allows better control over the flavor balance.
Flaky sea salt works best for topping because it adds crunch and contrast without dissolving completely into the caramel. Fleur de sel, smoked sea salt, or vanilla sea salt all work beautifully.
Vanilla Bean vs Vanilla Extract
Vanilla bean gives these caramels a gourmet feel. Tiny black specks throughout the candy make them look beautiful and taste incredible. Scraping a fresh vanilla pod into the caramel mixture infuses every bite with warm flavor.
However, vanilla extract remains a perfectly acceptable option if vanilla beans are unavailable. Use pure vanilla extract rather than imitation flavoring for the best results.
When choosing vanilla beans, look for pods that feel soft and flexible instead of dry and brittle. Fresh beans contain more aromatic oils and stronger flavor.
The combination of honey and vanilla creates an almost toasted marshmallow flavor once the caramel finishes cooking. Because of that, these candies feel deeply comforting and nostalgic.
How to Make Salted Honey & Vanilla Bean Caramels
Preparing the Pan and Cooking the Caramel
Before cooking begins, prepare an 8x8-inch pan with butter and parchment paper. This step prevents sticking and makes removal much easier later.
Next, combine heavy cream, sugar, honey, corn syrup, salt, and vanilla in a large heavy-bottomed pot. A large pot matters because caramel bubbles aggressively as it cooks.
Place the pot over medium-low heat and stir gently while the ingredients warm. Once everything dissolves, continue cooking without excessive stirring.
A candy thermometer becomes essential at this stage. Monitor the caramel carefully until it reaches 248°F. This specific temperature creates perfectly chewy caramels. Lower temperatures produce overly soft candy, while higher temperatures make hard caramel.
T=248∘FT=248^{\circ}FT=248∘F
Patience matters during this process. The caramel may seem slow to cook at first, but rushing with higher heat can lead to scorching.
Once the caramel reaches temperature, immediately remove the pot from heat and stir in the butter until fully melted.
Cooling, Cutting, and Wrapping
Pour the hot caramel into the prepared pan and smooth the top carefully. Wait about 10 minutes before sprinkling flaky sea salt over the surface. This slight cooling period prevents the salt from sinking.
Allow the caramel to sit at room temperature for at least 8 hours, though overnight works even better. Proper setting time ensures clean slicing later.
Once firm, lift the caramel slab from the pan using the parchment paper. Place it on a cutting board and slice into small squares using a sharp knife.
For cleaner cuts, lightly butter the knife blade between slices. You can also chill the caramel briefly if it feels too soft to handle.
Wrapping each caramel individually in wax paper or parchment transforms them into beautiful homemade gifts. Twist the ends like classic candy wrappers for a festive look.
These homemade caramels stay fresh at room temperature for several weeks when stored in an airtight container.
Tips for Perfect Homemade Caramels Every Time
Avoiding Common Caramel Mistakes
The biggest mistake when making Salted Honey & Vanilla Bean Caramels is ignoring the temperature. Candy-making depends heavily on precision, so always use a candy thermometer.
Another common issue involves using a pot that is too small. Because caramel bubbles aggressively while cooking, a large pot prevents dangerous overflow and messy spills.
It also helps to avoid distractions during cooking. Caramel can move from perfect to burnt quickly, especially near the end of the process.
If your finished caramel feels too soft, the mixture likely needed slightly more cooking time. On the other hand, hard caramel usually means it cooked beyond 248°F.
Humidity can also affect candy texture slightly. During very humid weather, caramels may stay softer than usual.
Creative Ways to Serve and Gift Caramels
These Salted Honey & Vanilla Bean Caramels make beautiful edible gifts during the holidays. Stack wrapped candies inside glass jars, decorative tins, or bakery boxes for a simple but thoughtful present.
You can also dip the caramels in melted chocolate for an extra indulgent treat. Dark chocolate pairs especially well with the honey and sea salt flavors.
For dessert boards, arrange sliced caramels alongside cookies, nuts, dried fruit, and hot cocoa. They also make wonderful additions to holiday cookie platters.
Another fun idea involves chopping the caramels into small pieces and folding them into brownies or blondies. Their buttery flavor melts beautifully into baked desserts.
Because the candies keep well, they are perfect for preparing ahead of parties, school events, or holiday gatherings.
Frequently Asked Questions
Why did my caramels turn out grainy?
Grainy caramel usually happens when sugar crystals form during cooking. Corn syrup helps prevent crystallization, so avoid skipping it.
Can I use vanilla extract instead of vanilla bean?
Yes. Pure vanilla extract works very well if vanilla beans are unavailable.
How long do homemade caramels last?
Wrapped caramels stay fresh at room temperature for several weeks when stored in an airtight container.
Can I freeze homemade caramels?
Yes. Wrap them individually first, then place them in a freezer-safe container for up to three months.
Why are my caramels too soft?
Soft caramel usually means the mixture did not fully reach 248°F before removing it from heat.
Conclusion
Salted Honey & Vanilla Bean Caramels combine buttery richness, smooth vanilla, floral honey, and flaky sea salt into one unforgettable homemade treat. Although caramel-making may seem intimidating at first, this recipe proves that patience and careful temperature monitoring are all you really need for success.
Whether you package them as holiday gifts, share them at family gatherings, or keep a hidden stash for yourself, these chewy homemade caramels always feel special. Their luxurious texture and cozy flavor make them a timeless dessert worth making again and again.
Leave a Reply